Entering Test Results for Drug & Alcohol Testing

DrugTestNetwork provides three data entry editors for drug & alcohol testing results and reporting:

  • Full Editor
  • Quick Editor
  • Collection Editor

Use the Full Editor to create new test result records for existing and new participants so every detail of the report record can be managed, including features for reporting by the Medical Review Officer (MRO).

The Quick Editor is designed for TPAs and Employers to quickly enter a new test result so the entry is efficient with the fewest clicks and data entry fields and allows the user to leverage as much existing data as possible.

The Collection Editor provides data entry for users that operate a clinic with features to create invoices for self-pay customers or services that are automatically added to the customer’s invoice that will be generated later.

Reason for Testing

One consideration for the choice of editors is whether the test result is for random testing or another reason for testing: pre-employment, post-accident, follow-up, return to duty, reasonable cause, etc.

Random Selection

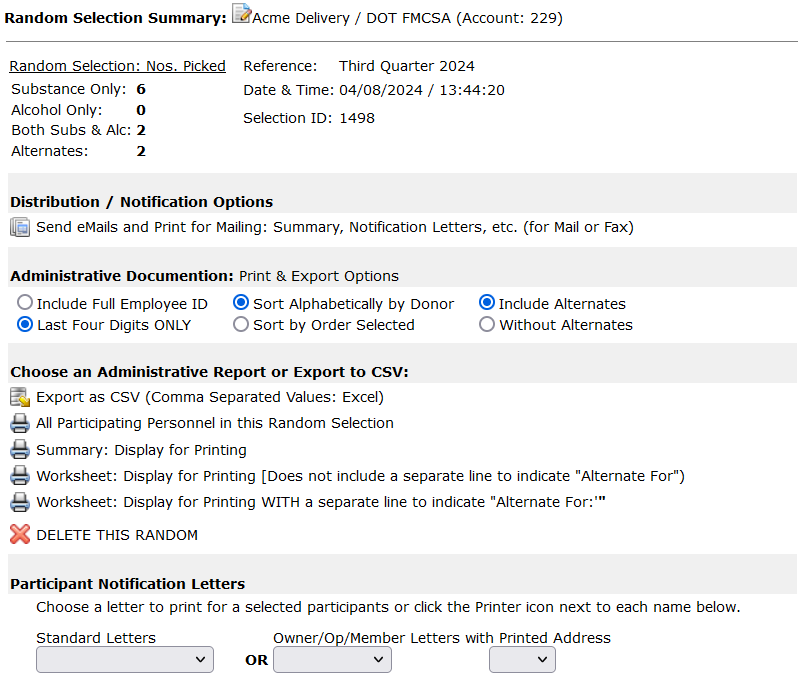
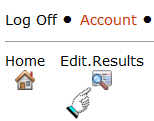
If the reason for testing is Random Selection, the test result record for the report already exists in the database.  When the random selection is conducted, an empty drug/alcohol record is created for each participant selected in the random.  These unresolved records are used to help notify clients that some random selection testing may not be complete. To find an existing test result, from the main page, at the top of the page, near the left, click the Edit Results symbol:

This option will open the Full Result Editor.  Enter a portion of the person’s name and click the button Search by Name.  When names are retrieved, click the edit symbol to open their record and complete the entry for the test.

Pre-Employment, Post Accident, Follow-Up Testing, …

From the Clients page, search for the company to which the report belongs.

On the line that represents the Client, click the symbol to open the module that will allow you to enter a new report record. This option is usually referred to as the Quick Result Editor. Using this resource you can find an existing personnel record for the person tested or enter a new personnel record if their name is not already in the database for the Client.  If the report is for pre-employment testing, their name may have not been yet entered.

To find an existing personnel record, enter a portion of their name and click the search symbol or click the option to Show ALL names in the participant list.
If the participant’s name is found, click the select symbol to choose their name for the report.  If the name is not found, enter their information in the area below.

Scroll down the screen to enter the rest of the information for the result and click Save when you’re done.

List All Non-Consortium Members

DrugTestNetwork: List All Non-Consortium Members

A new feature was released today in the DrugTestNetwork application streamlines the account management: the List All Non-Consortium Members option. This new “search request” is selected from the dropdown list of Consortia, on the main page where users search for companies to manage, or list the accounts that are members of the consortia setup by the subscriber.  The search query is not new. It has simply been added as a one click option.

What Does This Feature Do?

The “List All Non-Consortium Members” option is designed to make it easier for users to identify and manage accounts that are not part of any consortium. By selecting this option from the dropdown, you can instantly view a complete list of all non-consortium member companies under your management. This feature is particularly useful for quickly accessing and updating the random selection parameters (profile) for these accounts, ensuring that no company is overlooked in the random drug and alcohol testing process.

Why Is This Feature Important?

  • Simplified Account Management: Quickly access and manage all non-consortium member accounts in one place, without having to sift through individual companies or consortia.
  • Enhanced Oversight: Ensure that all accounts, including those not part of a consortium, have their random selection parameters accurately configured and up-to-date.
  • Improved Efficiency: Reduce the time and effort required to manage non-consortium members, allowing you to focus on ensuring compliance and maintaining a safe workplace.

How to Use This Feature

  1. Navigate to the Main Page: Start by logging into the DrugTestNetwork application and navigating to the main page where you typically search for companies to manage.
  2. Open the Dropdown List of Consortia: Locate the dropdown that lists the consortia you have created.
  3. Select “List All Non-Consortium Members”: Click on the new “List All Non-Consortium Members” option. This will immediately display a list of all accounts that are not currently part of a consortium.
    From the drop-down the option select ALL Non-Consortium Accounts:
    and click the first symbol on the right
  4. Manage Account Profiles: From the list, select an account to review and adjust their random selection parameters (profile) as needed. To open the account profile editor, click the edit symbol on the far left on the line that lists the account:

other list options

This search query can also be initiated from the main page, Clients, by clicking on the symbol under Search By:

When you click the symbol more query options are presented to list accounts:

SUMMARY

The addition of the “List All Non-Consortium Members” feature is part of our ongoing commitment to making DrugTestNetwork as user-friendly and efficient as possible. We believe this new feature will greatly enhance your ability to manage non-consortium accounts, ensuring that every company under your management receives the attention and oversight it needs.

We encourage you to explore this new feature and see how it can improve your workflow and account management processes. As always, we welcome your feedback and are here to support you in getting the most out of DrugTestNetwork.

Random Selection Scheduling for Non-Consortium Members

Random Selection: Schedule for Non-Consortium Members / Individual Pools

Introduction

For random drug and alcohol testing, a company may choose to join a consortium, where the random selection is conducted across all the member companies from a list comprised of all the members’ eligible personnel. A company may prefer not to join a consortium and have the random selection pick participants for testing from their list of personnel as a stand alone or individual pool.

For drug and alcohol testing management, one challenge many TPAs face is ensuring that every account has random selection conducted as per the company requirements for DOT regulation and/or their Drug Free Workplace policy. The challenge is especially pronounced for companies that are not part of a consortium, where individual management of employee lists can lead to oversight. DrugTestNetwork addresses this challenge with its proprietary scheduling feature, specifically designed for non-consortium members; stand alone pools.

The Importance of Scheduling for Non-Consortium Members

For companies that do not participate in a consortium—referred to as “Individual Pools”— the task of managing random drug and alcohol testing can be a concern so the company’s random selection is not overlooked.  Unlike consortium members, whose employees are drawn from a shared pool, non-consortium companies are managed individually.

How the Scheduling Feature Works

The scheduling feature in DrugTestNetwork is designed to eliminate the guesswork and manual tracking associated with managing random selections for non-consortium members. Here’s how it works:

  • Customizable Frequency: Each account can be set up with a specific random selection profile that includes the frequency of testing. Users can choose from options such as Weekly, Monthly, Twice Annually, or Annually. This ensures that each company’s unique requirements are met without manual intervention.
  • Automated Date Tracking: Once a random selection is conducted, DrugTestNetwork automatically updates the “Next” date for the next scheduled random. This is calculated based on the frequency set in the profile, ensuring that no account is ever overlooked.
  • Query-Based Alerts: Users can easily query which accounts are due for their next random selection based on the current date. This feature is particularly useful for users who manage multiple accounts, providing a quick overview of upcoming obligations and reducing the risk of missing critical testing dates.
  • Historical Records: The system also keeps track of the “Previous” random selection date and the date the random selection list was sent to the company contact. This historical data is invaluable for audits, compliance checks, and internal reviews.

Tutorial: Configuring the Scheduling Parameters

To make full use of the scheduling feature for non-consortium members, it’s essential to correctly configure the account’s scheduling parameters. These parameters are found under the “Random Selection Parameters” section of the account profile editor. Here’s a step-by-step guide on how to set them up:

  • Access the Account Profile Editor:
    • Navigate to the specific account you need to configure.
    • Open the account’s profile editor by selecting the account from your list of managed companies.
  • Locate the “Random Selection Parameters” Section:
    • Within the account profile editor, scroll down until you find the “Random Selection Parameters” section. This section contains all the settings you need to control the scheduling of random selections for this account.S
  • Set the Attribute for the Account: Participates in Random Selections:
    If the TPA is not managing random selections for a company, this attribute should be set to No. Under the Utilities menu the TPA will find a report to show all accounts whose attribute is set to No.
  • Set the Frequency:
    • In the “Frequency” dropdown menu, choose how often random selections should occur. Options include Weekly, Monthly, Twice Annually, and Annually. Select the option that aligns with the company’s testing requirements.
  • Review the “Next” Date:
    • This is the date the next random selection will be conducted for the account. When the random selection control is opened to generate the randoms, the “Next” date will be calculated automatically, based on the frequency indicated for the account. You can review and adjust this date if necessary, although it’s recommended to let the system handle this automatically for consistency.
  • Monitor the “Previous” Random Selection Date:
    • The “Previous” date field will display the last time a random selection was conducted. This field is automatically updated by the system after each random selection, and is useful for tracking and auditing purposes.
  • Save Changes:
    • After configuring the scheduling parameters, be sure to save your changes. This will ensure that the system follows the newly set parameters for all future random selections.

Benefits of the Scheduling Feature

  • Ensures Compliance: By automating the scheduling of random selections, DrugTestNetwork helps users maintain compliance with regulatory requirements and company policies, reducing the risk of penalties or legal issues.
  • Reduces Administrative Burden: The scheduling feature significantly reduces the administrative load associated with managing random drug and alcohol testing, allowing users to focus on other critical tasks.
  • Increases Efficiency: With the ability to quickly identify which accounts need their random selections conducted, users can efficiently manage their workload and ensure that no account is left behind.

Summary

The scheduling feature for non-consortium members is a convenience and a great tool for ensuring the integrity and reliability of your drug and alcohol testing program. By automating the process and providing clear, actionable insights, DrugTestNetwork empowers users to manage their responsibilities effectively and with confidence. This feature is essential for any organization committed to maintaining a safe and compliant workplace.

Random Selection for a Consortium and Individual Pools

DrugTestNetwork Overview

DrugTestNetwork is an SaaS (Software as a Service), browser-based drug and alcohol data management system application designed to facilitate the management of drug and alcohol testing Third Party Administrators who manage multiple companies, employers who manage their own DOT compliance and drug free workplace, or schools who need to mange drug free sports and a drug free campus. It enables users to oversee and organize lists of people who participate in random drug testing, ensuring compliance and maintaining safety standards across different organizations.

Consortium Feature

One of the standout features of DrugTestNetwork is the Consortium Management functionality. This feature allows users to group together multiple companies under a consortium, making it possible to perform random selections of employees from a shared pool. When a company’s list of employees is declared as part of the consortium, these employees are added to a collective pool from which random selections are made. This is especially useful for organizations that prefer or require pooled testing across several companies, ensuring a broader and more randomized selection process.

  • Non-Consortium Companies (Individual Pools): For companies that do not participate in a consortium, DrugTestNetwork provides the option to manage these companies as Individual Pools. In this setup, random selections are conducted exclusively within the company’s own employee list, rather than from a shared pool. This is ideal for companies that prefer or require independent testing protocols.

Random Selection Scheduling

To further enhance the random testing process, DrugTestNetwork offers a robust scheduling feature that allows users to automate and manage the timing of random selections.

  • Random Selection Profiles: Each company or individual pool is assigned a Random Selection Profile. This profile includes the following critical components:
    • Frequency: The user can specify how often random selections should occur. Options include Weekly, Monthly, Twice Annually, and Annually.
    • Next Date: The system tracks the next scheduled date for a random selection. This date is automatically updated when a new random selection is generated.
    • Previous Random Date: The date when the last random selection was performed, along with the results, is recorded and can be reviewed at any time.
    • Result Reporting: After a random selection is run, the results are automatically sent to the designated company contact.
  • Automatic Scheduling Updates: Once a random selection is generated, DrugTestNetwork automatically calculates and sets the Next Date based on the specified frequency. This automation reduces administrative burden and ensures that random testing schedules are consistently maintained without manual intervention.
  • Query-Based Scheduling: Users can easily query which accounts are due for their next random selection based on the current date and the scheduled frequency. This query function simplifies the process of identifying and managing upcoming tests, ensuring that no account is overlooked.

Benefits

  • Efficiency: Automates the management of random drug and alcohol testing, reducing manual effort and administrative overhead.
  • Flexibility: Accommodates both consortium-based and individual testing models, catering to different organizational needs.
  • Compliance: Ensures consistent adherence to testing schedules, helping companies maintain compliance with legal and policy requirements.

Summary

DrugTestNetwork’s comprehensive features, including consortium management, individual pool management, and automated random selection scheduling, make it an indispensable tool for organizations that prioritize effective and compliant drug and alcohol testing practices.

Follow-Up / SAP / EAP / Periodic Random Testing

Setting Up an Employee for Random Periodic Drug and Alcohol Testing After a Positive Test and Issue a document with the dates to the Employer:

When an employee tests positive for drugs and/or alcohol in a random drug test, the employee may be required to participate in random periodic testing to protect their employment, ensure compliance, safety, and rehabilitation. This process involves setting up a testing schedule that covers weekly, or monthly testing over a specified period; for example, a year.  Scheduled dates are randomly generated based on the Periodic Testing Profile established for the employee as outlined below.

Developing a Testing Schedule: Frequency & TimeFrame:

  • Frequency: The number of tests required within a TimeFrame.
  • TimeFrame: For example:
      • 7 = Weekly
      •  30 = Monthly
Frequency/TimeFrame determines how often the employee requires testing:
    • 1/7 = once a week
    • 2/14= twice every 14 days.
    • 1/30= once a month

Setting up the Periodic Profile for an employee:

Open the personnel profile editor for the employee.

Open the section: Periodic Testing: By Color or No. Days/Period & Test Protocols

To establish a tailored set of dates for the employee, check the box:
Periodic Testing [Custom Schedule].  Color Testing is outlined in another article.

The example above establishes testing once a month between July 1, 2024 through July 31, 2025.

The Testing Protocol outlines the testing required.

Click the info icons to learn more about each component.  Be sure to save the record when you’re done.

When the record is saved, click the tools symbol to open data management options for the employee.

From the options choose:

When the page opens, follow the instructions to create random dates.

Issue a document (PDF) with the dates and testing requirements to the company supervisor:

Once you’ve created the random dates for testing, you can issue a document to the employee’s supervisor with an outline of their requirements for testing and the dates for the tests.  To issue the document, first locate the data resource options for the employee from the main menu: Personnel.

From the Personnel page, search for the employee, and from the search you’ll see the click the tool symbol that appears on the line for each person returned by the search query.

As shown below, from the Tools/Resource page click the option:
Issue a Document for …

Choose the Document Template SAP / EAP (this is a sample document template that was provided with your subscription to DTN and can be found under Other_Data > Section 6.b General Documents.  Using these templates you can create documents that automatically fill-in the company name for the account, contacts, employee name & ID, etc.  for any content you might need.  The SAP/EAP template is specific to this example.  The issue document module recognizes keywords {{keyword}} and replaces the occurrence of {{keyword}} with its respective data element.  For example, where {{employee}} appears in template, the module replaces it with the first and last name of the employee from their data record.  If you review the SAP/EAP template, you will see the {{keywords}} used for periodic testing and the dates generated.

Click the issue symbol to issue the document.

When you issue the document, it will get posted to the clients Document Clipboard and emailed to the company contact.


2024: DOT Random Selection Testing Percentages

DOT Random Selection Testing Percentages

The DrugTestNetwork Data Management application for Drug & Alcohol Testing tracks annual percentages for random drug and alcohol testing as per DOT Regulations (Department of Transportation).  The application tracks random selection percentages and collection percentages.  Percentages are based on the average size of the participant list across all random selections conducted annually.

Administration Drug Testing Rate Alcohol Testing Rate
FMCSA (Federal Motor Carrier Safety Administration) 50% 10%
FAA (Federal Aviation Administration) 25% 10%
FTA (Federal Transit Administration) 50% 10%
PHMSA (Pipeline and Hazardous Materials Safety Administration) 50% N/A
USCG (United States Coast Guard) 25% 10%
2024 Rates: These rates are subject to change based on the results of annual testing data and other considerations. It’s always a good idea to verify with the most current regulations from the DOT or the specific administration overseeing the industry.

Audit Request: Random Selection Summary

DTN: The DrugTestNetwork Data Management Platform is a software application that provides essential tools for managing DOT compliance. As a TPA, C/TPA, or an employer, the DOT may ask for a report to validate that random selections for drug and alcohol testing, for a consortium or individual account pools, have been conducted to meet the annual percentages required for DOT compliance.

This article covers reporting for the Random Selection Summary:

  • Consortium
  • Individual Account pools – not a member of a consortium.

For a Consortium:  The Random Selection Summary Report

Click the Clients menu to navigate to the main page of the application.

In the Consortium drop-down, choose the consortium for the summary report:

Select the consortium and click the report icon:
When the report window opens, choose the year for the report:

Scroll below the period options under the section Choose a Report, select Random Selection Statistics:


For Individual Accounts:  The Random Selection Summary Report
Search for the Account:

Click the Account’s report icon:
When the report window opens, choose the year for the report:

Scroll below the period options under the section Choose a Report, select Random Selection Statistics:

Audit Request: Proof of Enrollment

DrugTestNetwork’s Data Management Application provides the software tools essential for keeping track of data to insure DOT compliance. DOT Auditors will often ask for proof of enrollment for someone who is required to comply with DOT regulations.  One requirement for compliance is that all covered employees participate in random selections for drug and alcohol testing. Typically, Proof of Enrollment or Proof of Participation is verified by showing that the employee participated in each random selection for the calendar year of the audit.

Search for the Client/Company to which the participant belongs; i.e., the company that employs the  participant.

For the Client/Company, to list their random selections, click the icon:

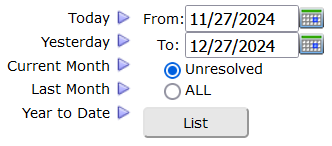
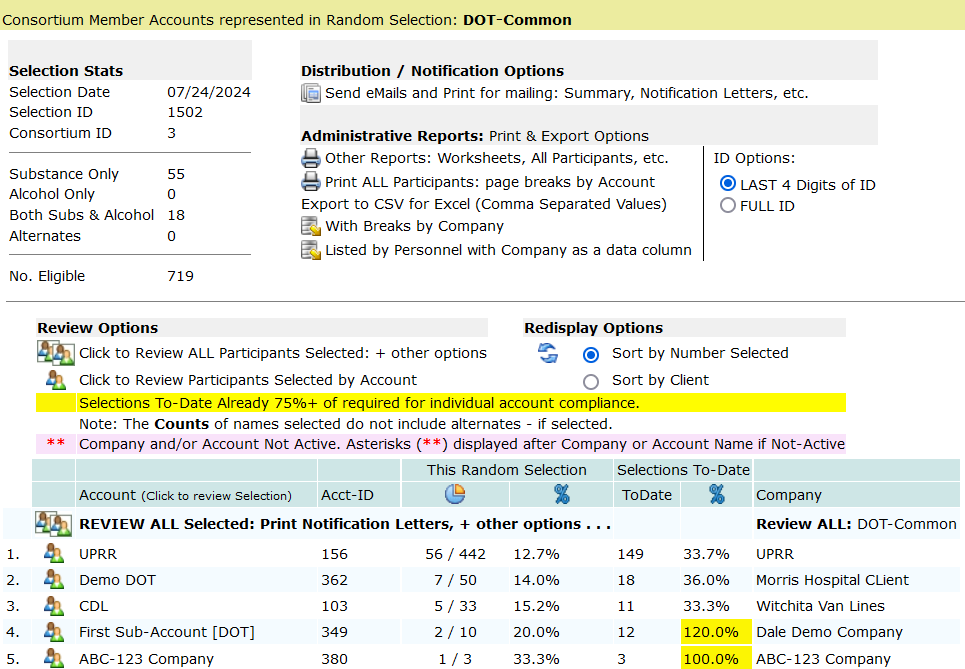
When the List Randoms window opens, enter the dates for the audit request and click Submit Request. For each random selection, click the people icon to show the list of participants in the random selection.

The person’s name appears in the list showing they participated in the random selection and were eligible to be picked for random drug/alcohol testing.

You’ll want to print this list for each random that was generated in the calendar period of the audit request.

Overall Qualitative Results: OQR

Every report for a drug/alcohol test includes an overall qualitative result (OQR).  A test result will report with OQR Positive if a single substance is reported Positive.  If all substances in the test report Negative, its OQR is reported as Negative.

To find test results with a specific OQR, for all clients, click the Result menu.  Under Results, click the report icon for option 6.b All Clients: specified calendar period

When the report control page opens, specify the dates for the report.  In section 2, choose an OQR (Result) from the dropdown list of OQRs.  For the DOT MIS Report, for example, test results considered as Other Refusals are test results with an OQR: DEC (Declined) or REFUSAL (Refusals).  Scroll to the bottom of the report control and click the option: Display to Screen.

If you want the same report for a single client account:

  • Search for the client.
  • On the line for the client account, click the report icon

When the report control page opens, near the top of the page, choose the report option
and then choose the same options as outlined above for reporting across all clients.

DOT MIS Report: Correcting Mode/Category

The DrugTestNetwork (DTN) Drug & Alcohol Data Management system manages all the required information for random selection testing, pre-employment, post-accident, reasonable suspicion, return to duty, and follow-up testing, so your data conforms, without issue, to the DOT MIS Report. Occasionally, data corrections are needed so nuanced details can be managed without complication.  Some corrections include making sure the Reason for Testing is consistent with the DOT guidelines.  Another correction often required is the Mode (FMCSA, FAA, PHMSA, FRA, USCG, and FTA) and the covered-employee categories reported.

The DOT MIS Report breaks the data down by each Mode/Category represented by the employees who have submitted to drug and alcohol testing and participated in random selections. The MIS Report produces a separate page for each Mode/Category represented by the data. The no. of employees covered under each Mode/Category reported in the MIS is based on the average no. of employees who participated in random selections conducted within the period of the report.

Steps to Make the Required Corrections:

  • Set the Mode in the account profile for all accounts that participate in testing.
  • For the calendar period that will be covered by the MIS Report, review the random selection audit records that preserve a list of all the participants and make sure each participant’s Mode/Category, in the audit record, is properly set.
  • Using the DOT MIS Analytics report, check that every test result properly states the Mode/Category for the donor.

Set the Mode for the Account:
Every personnel record for each participant must include the DOT Category for the Mode specified for the account roster. If the employer has employees under different Modes, a separate account is required for each mode: the DOT Mode applies to everyone in the roster under the account.  To set the Mode for an account, search for the company and click the Account Profile Edit icon and set the Mode.

Set the Mode for each Consortium Member:
If you need to correct the Mode for Consortium member accounts, on the main page of the application, choose the Consortium in the drop-down, as shown below, and click the first icon , on the right, to list all member accounts:

When the accounts are listed, click the Profile Editor icon and make sure the Mode for each account is properly specified as needed.

Optionally, consortium member accounts can be listed from the Consortia Mgt page. Click the menu Consortia to open the page.  Under the Consortia menu, all consortia in the subscriber’s account are listed with management options.  To list the members for each consortium, click the option icon Show Accounts:

The listing will show each member account, its Mode, the number of active employees in the roster and a option icons to open the Account Profile Editor and the Personnel Management Utility.  The list will also show how many personnel records in the roster are missing a Mode/Category specification. 

Audit Records:
When a random selection is generated the list of participants is saved as a permanent record.  This record is used to count the number of participants in each random selection and calculate the average across the randoms selections that were conducted for the reporting period of the MIS Report.  The audit record includes each person, and their Mode/Category,  who participated in each random selection.  An MIS Report page is provided for each Mode/Category represented.  If Mode/Category modifications are required for the Account, the Mode/Category for each person in the audit record must be changed too in order for the MIS to correctly report the no. of employees covered.

Correct the Mode/Category in the Audit Record:
To change the Mode/Category for each participant recorded in the audit record, you’ll need to list the random selections that were generated for the account or the consortium.  For random selections generated for individual accounts, search for the account and click the list randoms icon . For a consortium, choose the consortium from the drop-down as noted above and click the list randoms icon there on the right.

Enter the dates for random selections that were generated for the period of the MIS report. For each random selection, click the people icon to list everyone who participated in the random selection.

When the list opens, choose the Mode/Category you want to apply to everyone in the list from the the drop-down selector:

To choose everyone in the list, put a check the check-box on the header line at the top of the list:

When everyone is selected, click the DOT icon to apply the Mode/Category, specified in the drop-down, to everyone selected.

Test Result Reports Refer to Mode/Category and may need corrections:
After every participant’s Mode/Category has been set, you will need to set the Mode/Category for all the test result records that will be considered for the MIS report.

For an individual account, click the report icon

For a consortium, choose the consortium from the drop-down as outlined above, and click the report icon on the right.

When the report module, opens, indicate the year of the report and choose the report:

After you set the year of the report, scroll down to select the MIS Report option:

When the Analytics Report opens, you will find a Mode/Category drop-down (see image below) it will list all the drug/alcohol reports for the account or the consortium, depending on how you navigated to the report.  Each drug/alcohol test result will show if it conforms to the MIS Report.  For test results that do not conform to the MIS Report, the reason for the non-conformity will be shown under the test result record:

This example, above, shows the Mode/Category is not consistent with the Mode for the account to which the test result belongs. In the dropdown selection with all the Mode/Category options, choose the Mode/Category for the test result record, and check the box for each drug/alcohol test listed in the report (the checkbox is on the far left) that requires a Mode/Category correction.

Check ALL Checkboxes in a single click: You will find a checkbox at the top of the list, when checked, it will automatically check the box for all the result records listed:

When all the check-boxes have been set as needed, click the Set Mode icon, under the Mode/Category drop-down, shown in the image above, to set the Mode/Category to every test result record selected with a check-box.

When completed, you can generate the MIS Report with the Mode/Category corrected.

DOT MIS Report: Consortium & Members

For drug and alcohol testing, a company can join a consortium so their employee pool is combined with the other consortium members for random selection.  The random selection picks names from a list comprised of all active employees across all the members’ rosters.  Every member company is in DOT compliance simply by participating in the random selections, regardless if anyone from their company is picked.

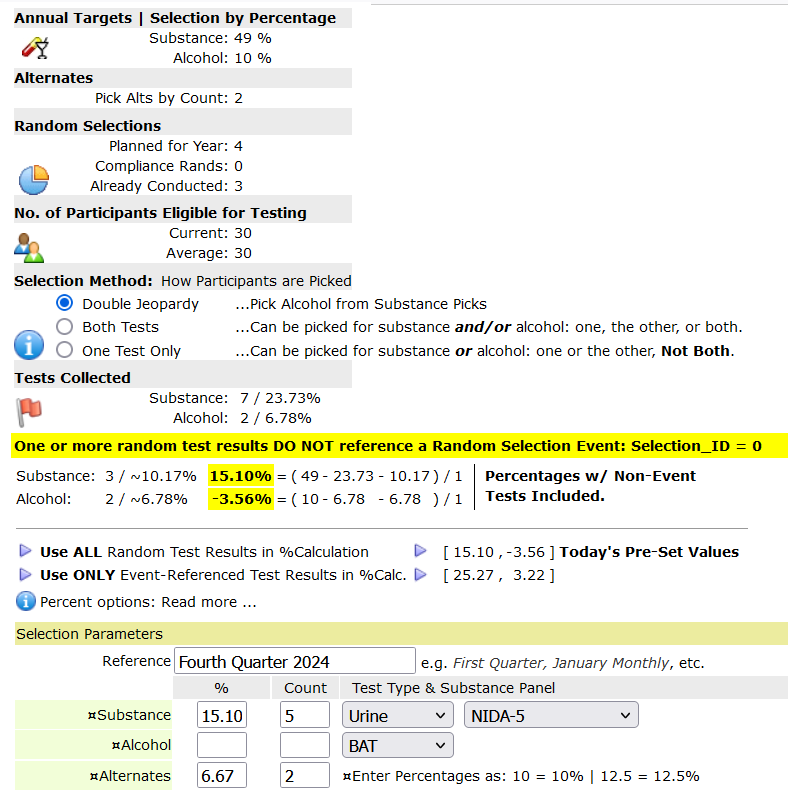
The DOT specifies annual targets for the number of random drug and alcohol tests that must be conducted.  For example, FMCSA requires 50% of the pool submits a urine sample for substance testing, and 10% of the pool submits to a breath alcohol test.  If these targets are met, the consortium is considered in compliance for random testing, which means every member company is in compliance regardless the number of random tests their company contributes to the overall numbers.  The annual percentages are based on the average number of participants across all randoms conducted for the year.  DrugTestNetwork’s data management application for drug and alcohol testing keeps a complete audit trail of the participant list for every random selection conducted.  When an audit is conducted, you will often be asked to produce a list of participants for each random.

You can generate the DOT MIS Report for the entire consortium and for each individual member accounts.  Typically, the TPA provides the MIS Report for each member’s testing and not for the entire consortium.  If audited, the DOT Auditor may ask the TPA for the MIS Report for the entire consortium. Companies with 50 or more drivers are required to submit the report to the DOT.  Companies with fewer are not required unless requested.  Check the DOT for these requirements as the details may change.

Consortium DOT MIS Report: To generate the MIS for the consortium, from any the main application pages, click the Consortia menu and then click the report icon  on the line that represents the consortium.

Individual Member DOT MIS Report: To generate the MIS for an individual company that is a member of the consortium, search for the company and click its report icon .

From the report module, choose the months to be covered in the report. For example, if you want just the first quarter, pick January and March, or for a full year report, pick January and December.  Below months,  indicate the year the report covers, and scroll down the page and click the option: DOT MIS Report.

Contact / Client Representative Profile

A Contact is a customer representative with whom you communicate regarding employee drug & alcohol test results, random selections, personnel / roster management, and more.  You can give contacts login access to view reports and manage their accounts.

Each company/client can have multiple contacts and each contact can be assigned to one or more accounts under the company.

The contact profile editor lets you control login access, what they can see and do when they log-in and what reports they receive through the application.

To add or edit a contact: from the Clients page, search for the account to which the contact belongs.  For the accounts returned by your search, near the left side of the listing, on the line that represents the company/account, click the Client-Mgt icon to open the management module.  When the module window opens, click the button, on the left, titled: Contacts.

Click the icon   to add a new contact or click the edit icon to edit the profile for an existing contact.

The contact profile editor has multiple sections. Continue reading